Saturday, September 10, 2022

A park scene with a bridge - part 1

First, the work to restore the missing photos is ongoing. It is a lot of them but I am slowly working through the posts, backwards in time.

In the meantime I have begun a new project - a small scene of a footbridge in a park. The inspiration is from a nearby park, namely Drottningholmsparken which is surrounding the royal residence here in the outskirts of Stockholm, Sweden. In that park there are a few (three I think) similar bridges across the ponds and canals. They all have wrought iron railings, painted green. Here are some photos.


I though that a scene with a bridge like this across some water would be fun to build. So I sat out to do just that.

I made the railings from brass rod, bronze wire and flat silver thread. The silver thread was for the curly shapes of the railings. I used silver thread since that was the only thing I could find in suitable dimensions. It was not that pricey after all.

I made a jig in order to be able to produce all the curly pieces in a consistent way. The jig was the just curly shape cut out to scale size in a piece of styrene sheet. Here is a work in progress picture also showing the silver thread and the jig.


All pieces of the railings were soldered together, and a bridge deck was made from balsa and basswood. Here the railings are test fitted on the deck.


I also made a first attempt at painting the deck, but I am not too happy with the result. I might need to redo that.


Thursday, September 8, 2022

Something is wrong with the photos - but no longer

Something seems to have happened with the photos on this blog. Many, or most, of the them are no longer visible. I'll try to fix that. 

Update September 13, 2022: The photos are now restored.

Sunday, September 4, 2022

Hyllerum - a Very Small Shelf Layout

Here I want to show you a small shelf layout, or rather a diorama, which I built a long time ago. I wanted to save them to this post before the web page on where pictures of it were displayed is going down.

Original web page text below:


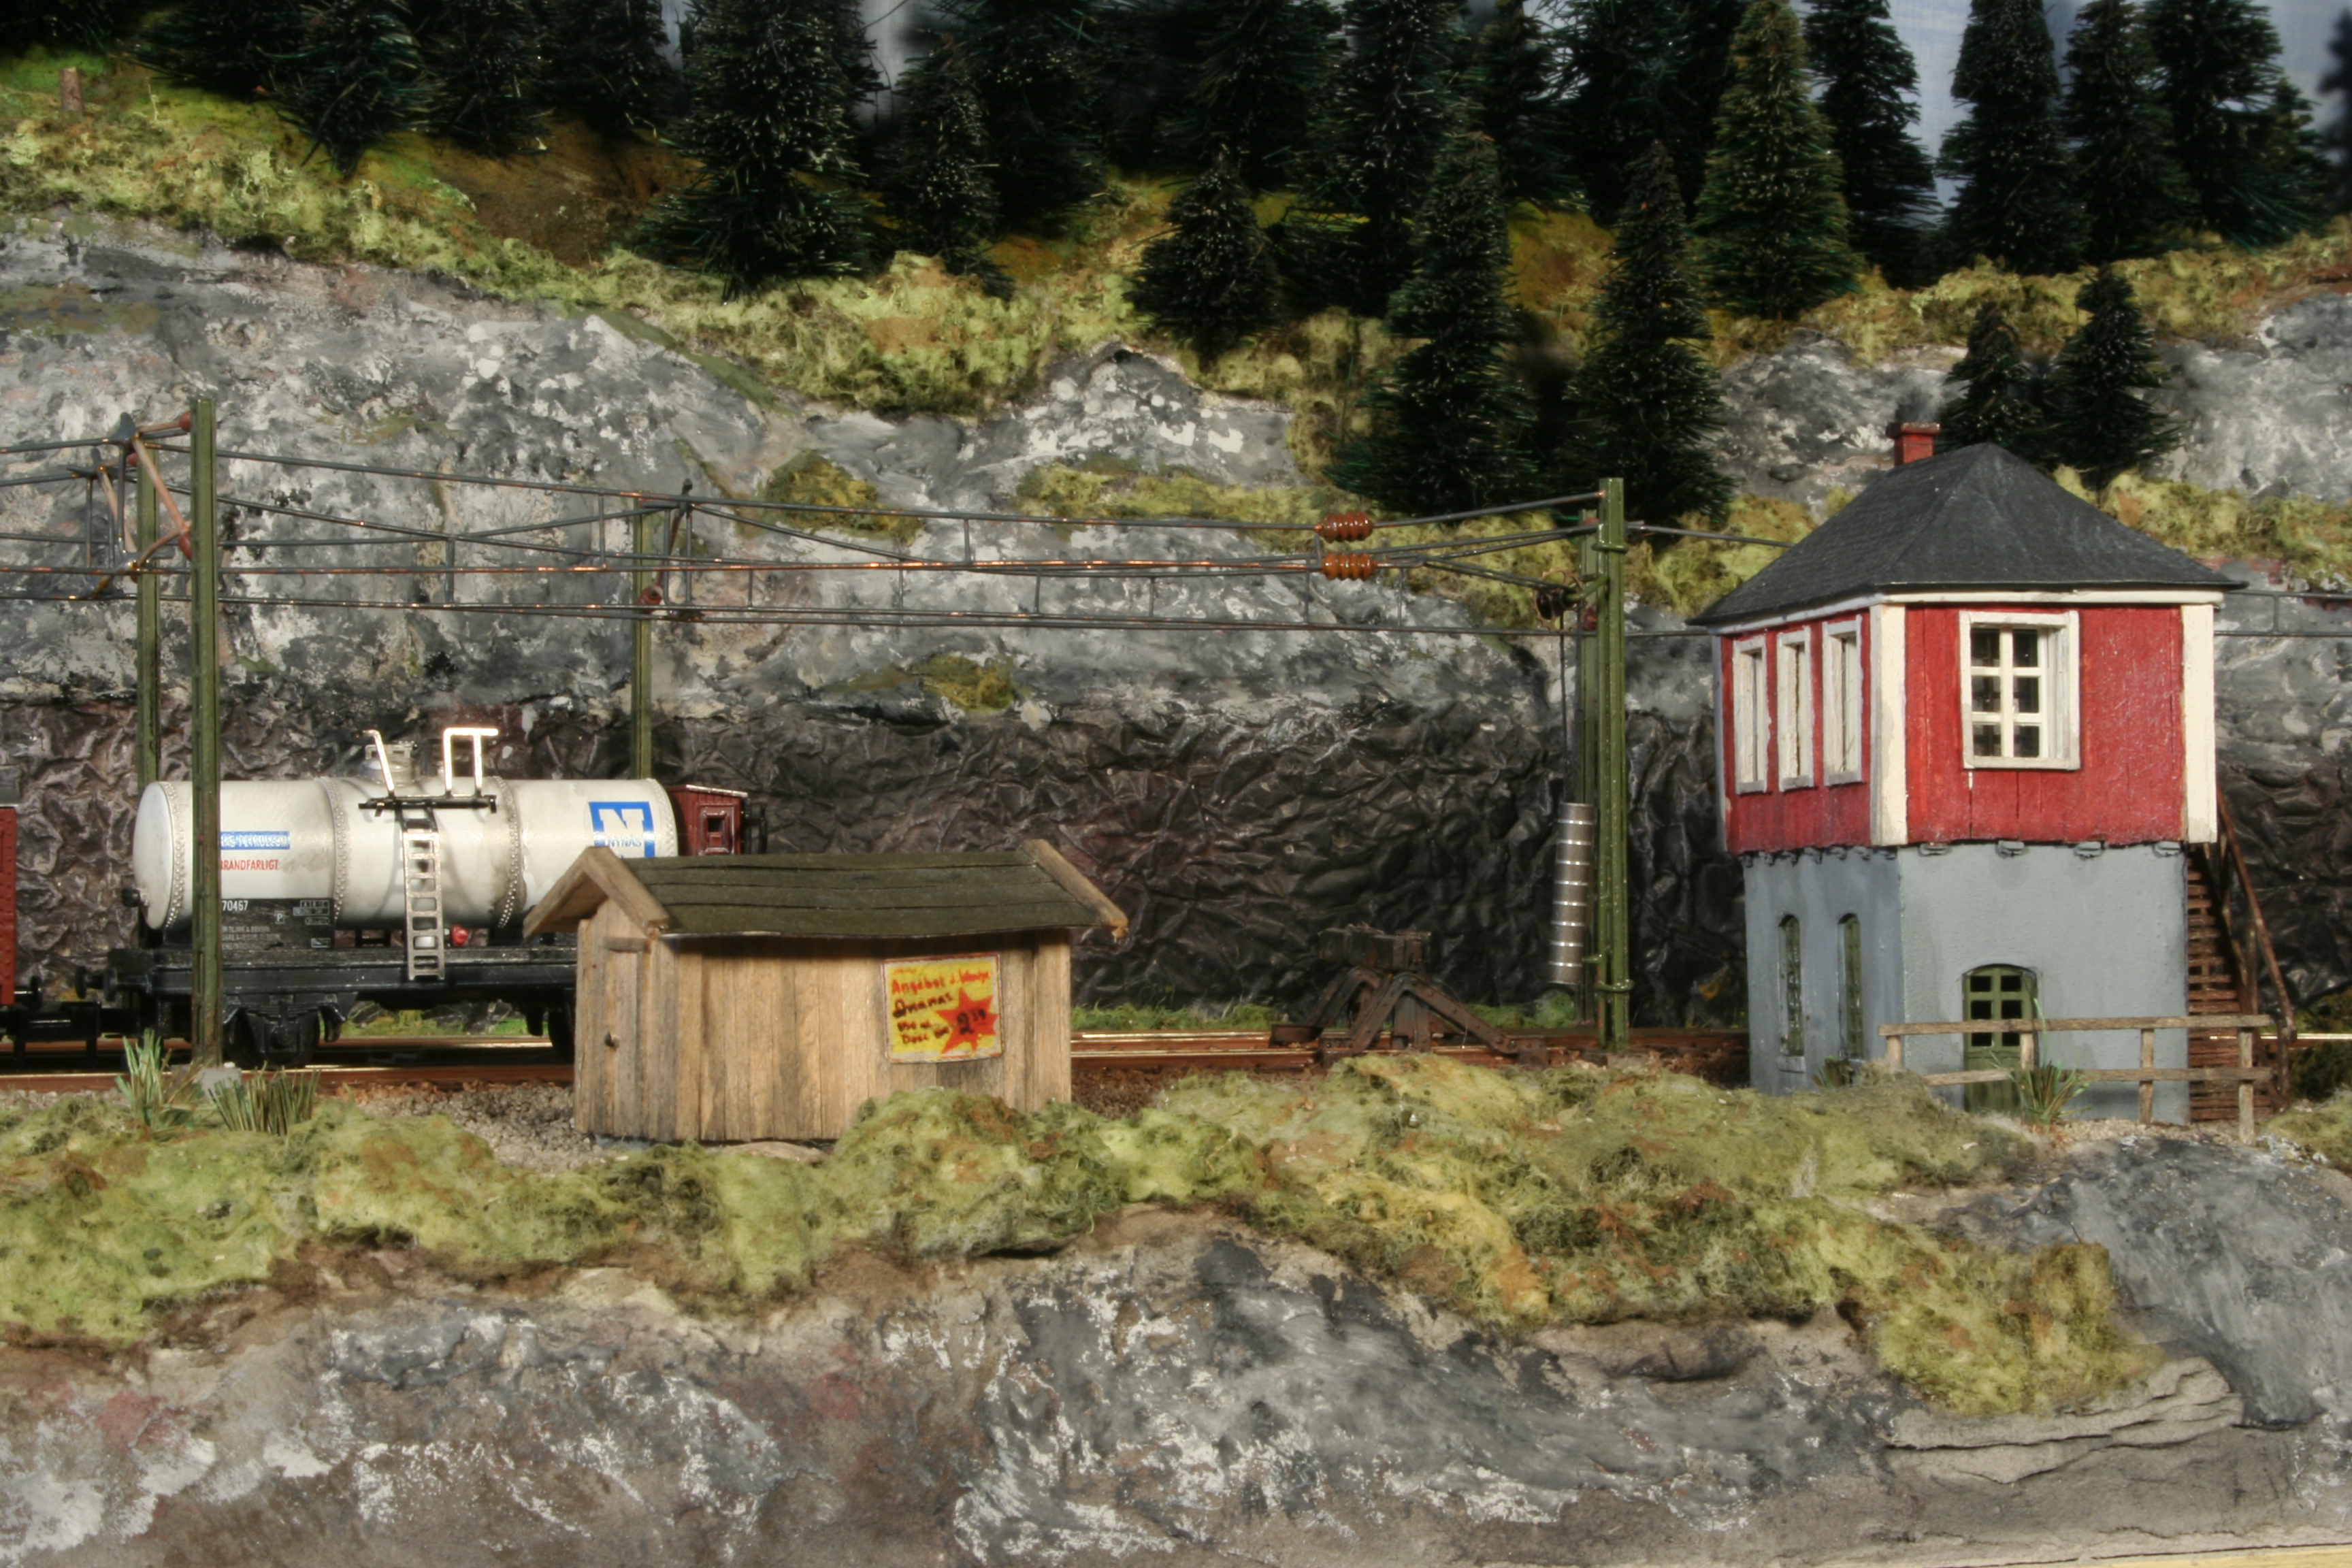
This diorama depicts a Swedish small city station. If I have to pin-point the era I would say the it is the 1960’s.


This is a stub end station, with one branch of the line going ‘north’ through the tunnel just behind the freight cars, and the other going ‘south’, passed the tower.


Below is a closer look at the station area. A typical Swedish passenger train, pulled by a type D electric engine is waiting to depart. This is a Train (with a capital “T”) to me, since this is what they looked like when I was growing up. The cars and the engine are all N scale Fleischmann models.


The platforms are scratch-built, while the houses are kit-bashed. 


The catenary is by Sommerfeldt and is “live”, meaning the diorama is in effect two totally overlapping DC electrical blocks. The type D engine can be controlled through the catenary while another engine can be independently controlled through the tracks.


The type D engine by Fleischmann is one of the few commercially available Swedish prototype N scale engines. As such it is very popular among Swedish N scale modelers. The engine is  nicely detailed, as are the passenger cars. The model is an example of one of the early N scale designs and is in my opinion a lousy runner. But it looks great!


The local switcher and some freight cars. The engine is made by Arnold, while the cars are by Roco. This engine is an even worse runner than the D engine, but since it at least is in an SJ (Swedish State Railway) paint scheme it has certainly earned its place on this diorama.


The tower from where the station area is controlled. The petroleum tank car on the spur is from Arnold.


Yet another shot of the tower and the cars on the spur.


The switcher is picking up a mail express car.


The passenger train has departed and passes the tower on its way ‘south’.


The Gorge - an old diorama

This is a diorama I built a long time ago - sometime during the 1990's. I decided to put up pictures of it here before terminating the old web page where they once were hosted. 

Original text below:

This diorama shows a fictitious gorge. In this set of pictures it is obviously located somewhere in North America, since a Chicago & Northwestern train is just crossing the bridge.


The cliffs are made from foam insulation board, roughly sawed with an ordinary carpenter’s 


A Below is a closer look at the bridge, which is scratch-built from styrene. The abutments are made of plaster poured in a mold. When the plaster had hardened the stone shapes where carved using a sewing needle, and last the abutments where colored using a light gray water-color wash.


The pines where originally supposed to look Swedish, but perhaps they can pass as North American pines as well. They are made from barbeque sticks in which I drilled holes and inserted wire to simulate branches. After painting the trunks and branches, Woodland Scenics clump foliage was glued to the branches. The forests floor was done using various Woodland Scenics material and natural sticks and stones.


The river was made using Woodland Scenics E-Z Water. The stones along the river bank are natural pebbles, collected just outside my home in Sweden.


A peek from inside the gorge.


A view from high above, looking down at the gorge and the train crossing the bridge.


H0 Superior Detritus #238

This is an old write-up of an old project. I just wanted to rescue the it from the old defunct web page where it has been sitting for years. Here goes (original unedited text):


A small ad in Model Railroader magazine got my attention. The ad promoted a H0 boxcar kit, namely the “Superior Detritus Company #238” car. I was immediately hooked and knew I had to build this kit, “wrong” scale or not

The finished car is shown in these pictures, on a piece of H0 track placed in front of my N scale layout. Does it not just look great? Makes you seriously consider switching to H0.


The kit is produced by Full Circle Models, N.Y. (http://fullcmodels.com/), and includes a wealth of nifty details. It is a very well designed kit but requires your full attention and concentration. But as I see it, that is a big part of the fun. Also, any questions and problems are quickly answered and resolved by Chris at FCM.

Highly Recommended!

With a model as nice as this one I just had to try Proto:87 wheels, instead of  the original standard H0 wheels. Looks better, right?


Thursday, March 11, 2021

A Bus Stop

Blog Catch Up: This really happened during June and July 2020, although the wording of the text makes it seem as if it happened today.

I have quite often passed a particular bus stop in the western suburbs of Stockholm, Sweden. I sort of liked the setup and decided to do a diorama of it. Here is a street view of it, from Google Maps.


The dioarama was to be built in the 1:35 scale, as all of my dioramas so far. I started the build with the bench, which was made out of brass rods and wood strips. Here it is, with the backrest still missing.


And here it is completed.


Next up was the bus stop sign, which was made of brass tubing and brass sheeting.


I made the actual signage in MS Power Point and printed it on ordinary printer paper, which I then glued to the sign. I also made time table boards and a waste paper basket.


Here is the bench and the sign. Obviously this picture was taken before I added the waste paper basket. 😀


With the "main actors" in place I started out on the dioarama itself, most of which was carved from extruded foam.


Eventually, it all came together like this.


A barn, featuring a Ferguson TE20

Blog Catch Up: This really happened in June 2019, although the wording of the text makes it seem as if it happened today.

As shown in earlier posts I have built a Ferguson TE20, from a Heller kit. I have now built a diorama as a place to show off the Fergie. The scene is a farm yard right outside a barn. The barn is shown as a single wall, built in a typical Swedish 1800 or early 1900 fashion, but having survived in to the late 1900:s. All items, excpet the Fergie itself and the spade, are scratch built. And yes, the cat is a photo 😊


Late date addition:
Explanation of how the weeds and the tree were made.

First off, the weeds along the grindstone. Those were made from sisal fibers and Noch leaves. A some point I bought a bag of fibers dyed green (it will last a lifetime). I cut snippets of those fibers to use as stems. I want the pieces to be fairly straight, as shown to the left below. Next I dip them in PVA glue, followed by a dip in some Noch mid green leaves, as in the right picture below. If you dilute the glue with a few drops of water it will be less tacky and the fiber will pick up fewer leaves. In my opinion that gives a more weedy look.


If you look carefully you can also see some weeds with ivory shaped leaves. Those are actually pieces from a Mini-Natur ivory mat. I know ivory does not grow freestanding like that, but from a distance I think these small pieces can pass as some kind of generic weeds.


The tree is a wire armature tree. There are a lot of descriptions on the net of how to do those, but here is a brief walkthrough of how I tend to do it. Maybe some of you have not seen this before and find it useful.

I start out with a wood skewer which I cut to suitable lenght. I leave a piece that will be used to secure the tree in place in the "ground", and then start to wrap the skewer with floral wire. You can use any wire you have handy. Every now and then I let the wire do a loop, before I continue wrapping the skewer (step 1 below). You add a loop wherever you want a branch. Next I cut the loops open (2), and then twist them into the beginning of a branch (3). I then cut a piece of wire and bend it into a V-shape, and twist that piece to a branch so that it all forms a branch that divides once more (4).


When you are done you have a tree like the one to the left below. I then add various compunds (spackel compound and/or PVA glue and likewise) to the stem and inner parts of the branches to give them a little more structure and hide the wire pattern. A tree after this kind of treatment is shown to the right below.


n this case, a birch tree, I painted the tree with white and black colors (left below). Next I add static grass fibers. These act as smaller twigs and as a place for the leaves to eventually sit. I used 10 mm fibers in this case. To attach the fibers i spray the tree with hair spray, and then sprinkle the fibers on to the tree. You need to spray and sprinkle not only from the top but from the sides and the underside as well in order to get fibers everywhere you need them. After this step your tree looks as in the middle picture below. The final step is the leaves. Using the same hair spary technique I sprinkle on Noch leaves. In this case l used light green leaves, for a birch in early summer. Final result to the right below.