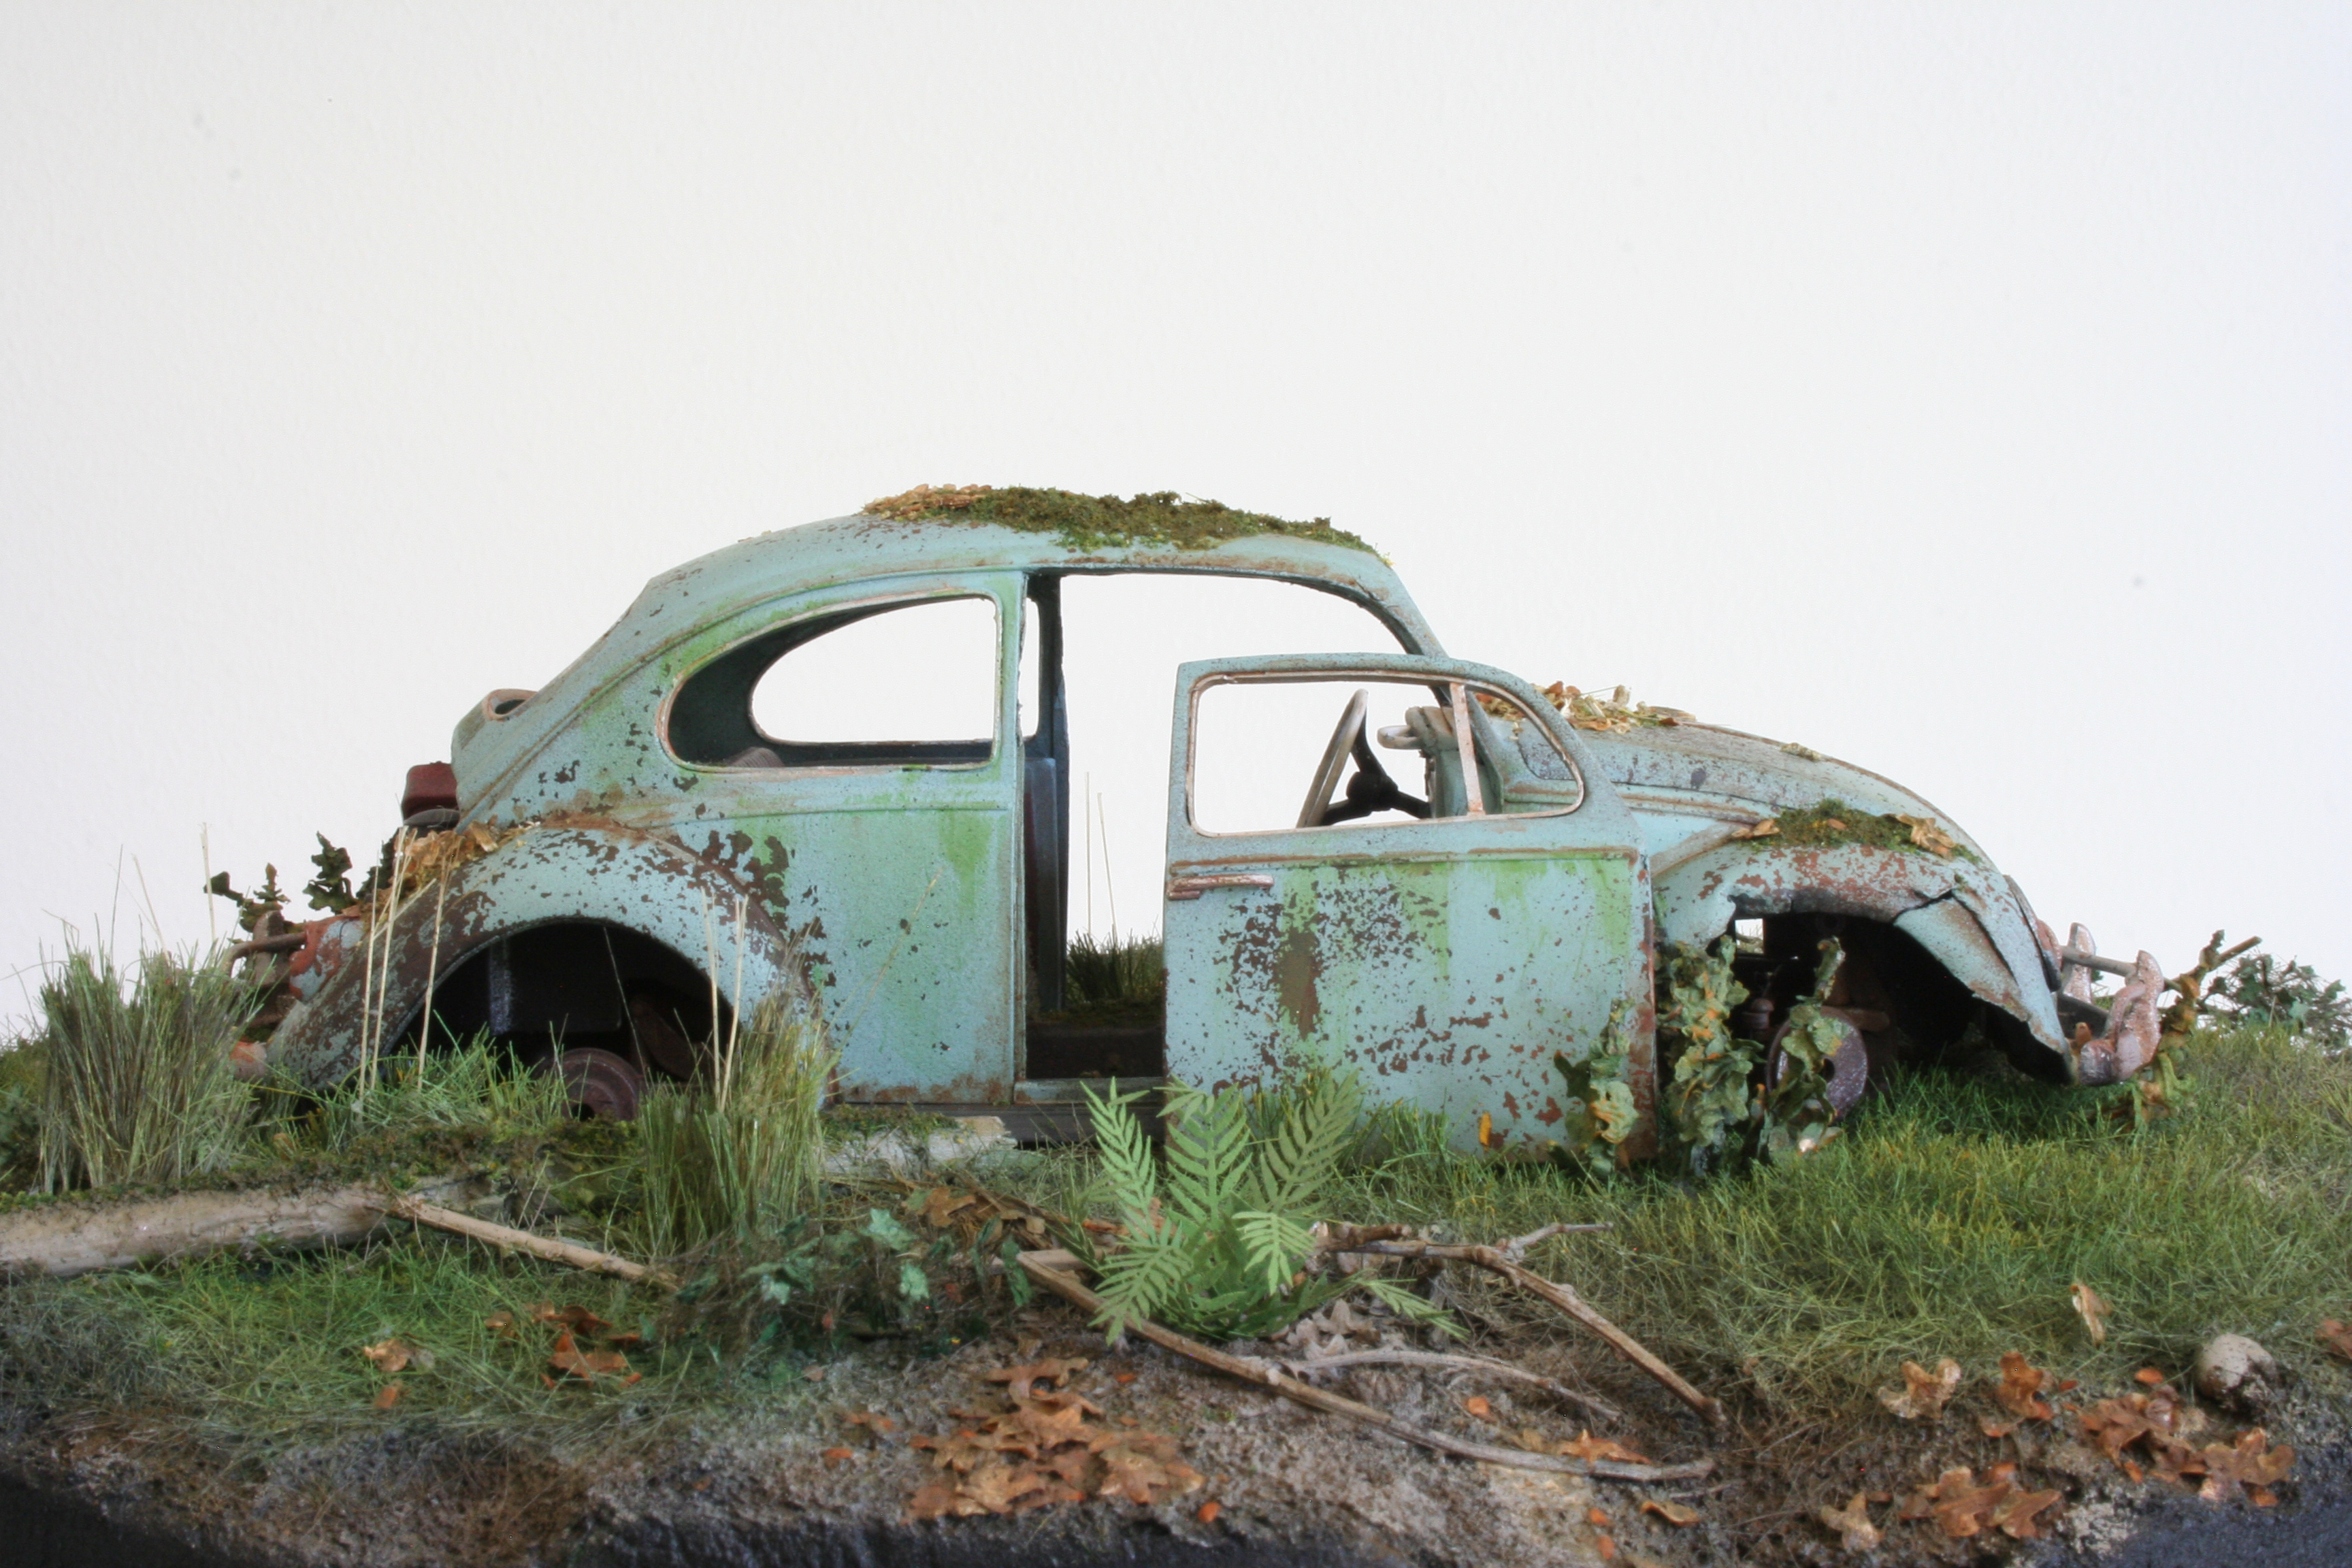
The diorama/vignette/scene, whatever you want to call it, is done. Here is an overview picture.

And a few closeups.


A blog about my non-railroading modeling.
The diorama/vignette/scene, whatever you want to call it, is done. Here is an overview picture.
And a few closeups.
First paint pass on the grass - buff.

And then a number of passes with green and greenish-yellow tones, and some others. The grass-less patches also got some color. I wanted a somewhat dried out look, not anything lush, so I think I'll stop here and see what it looks like when I have added the wall and the decaying stuff, and uncovered the street.

I added some more grass tufts, and some more 6 mm static grass as well.

And then, surprisingly, but as I have seen been done by others, and have done a few times myself, painted all of the grass and terrain black!

Why would you like to do a thing like that? Firstly, if you use a variety of different vegetation materials and of different brands the effect might end up a little off, often with colors a little too bright and shiny. Natural colors are often very subdued. One way to get round that is by airbrushing everything with colors of your own choice, and for this to work you would like a consistent base color. Using black as that color furthermore helps creating fake shadows and depth.
None of this is my idea to start with, but something I have picked up from various online sources. But I have used it before, and like it.


The street is being paved, by glueing the stones one-by-one to the foam base. Madness? Anyhow, here they are all in place.

After which they were painted and otherwise treated to make it all look like an old paved street.
I also took the time to
- Build and weather a barrel, supposedly used by some hobos for a warming fire.
- Dip some scale sized pieces of corrugated (aluminum) sheeting in an etchant (ferric chloride solution) to give them a rusty look.
- Make some loose bricks representing a few of those which have fallen off the wall.

I have begun laying out the scene itself.

The base is a piece of foam on which the brick wall will sit at an angle, just to make it a little more lively. At the front a piece of a stone paved street will show. To get the rest of the terrain, and the wall, a bit higher than the street it will sit on a piece of foam board. That's the black piece in the picture above.
Here is a picture of me cutting 4 mm cork into Belgian Blocks for the street. Yes, I could have scribed and carved the stones right out of the foam, but I just did a brick wall that way...

More work on the brick wall. First some forming and sculpting in order to get a more varied and interesting look.


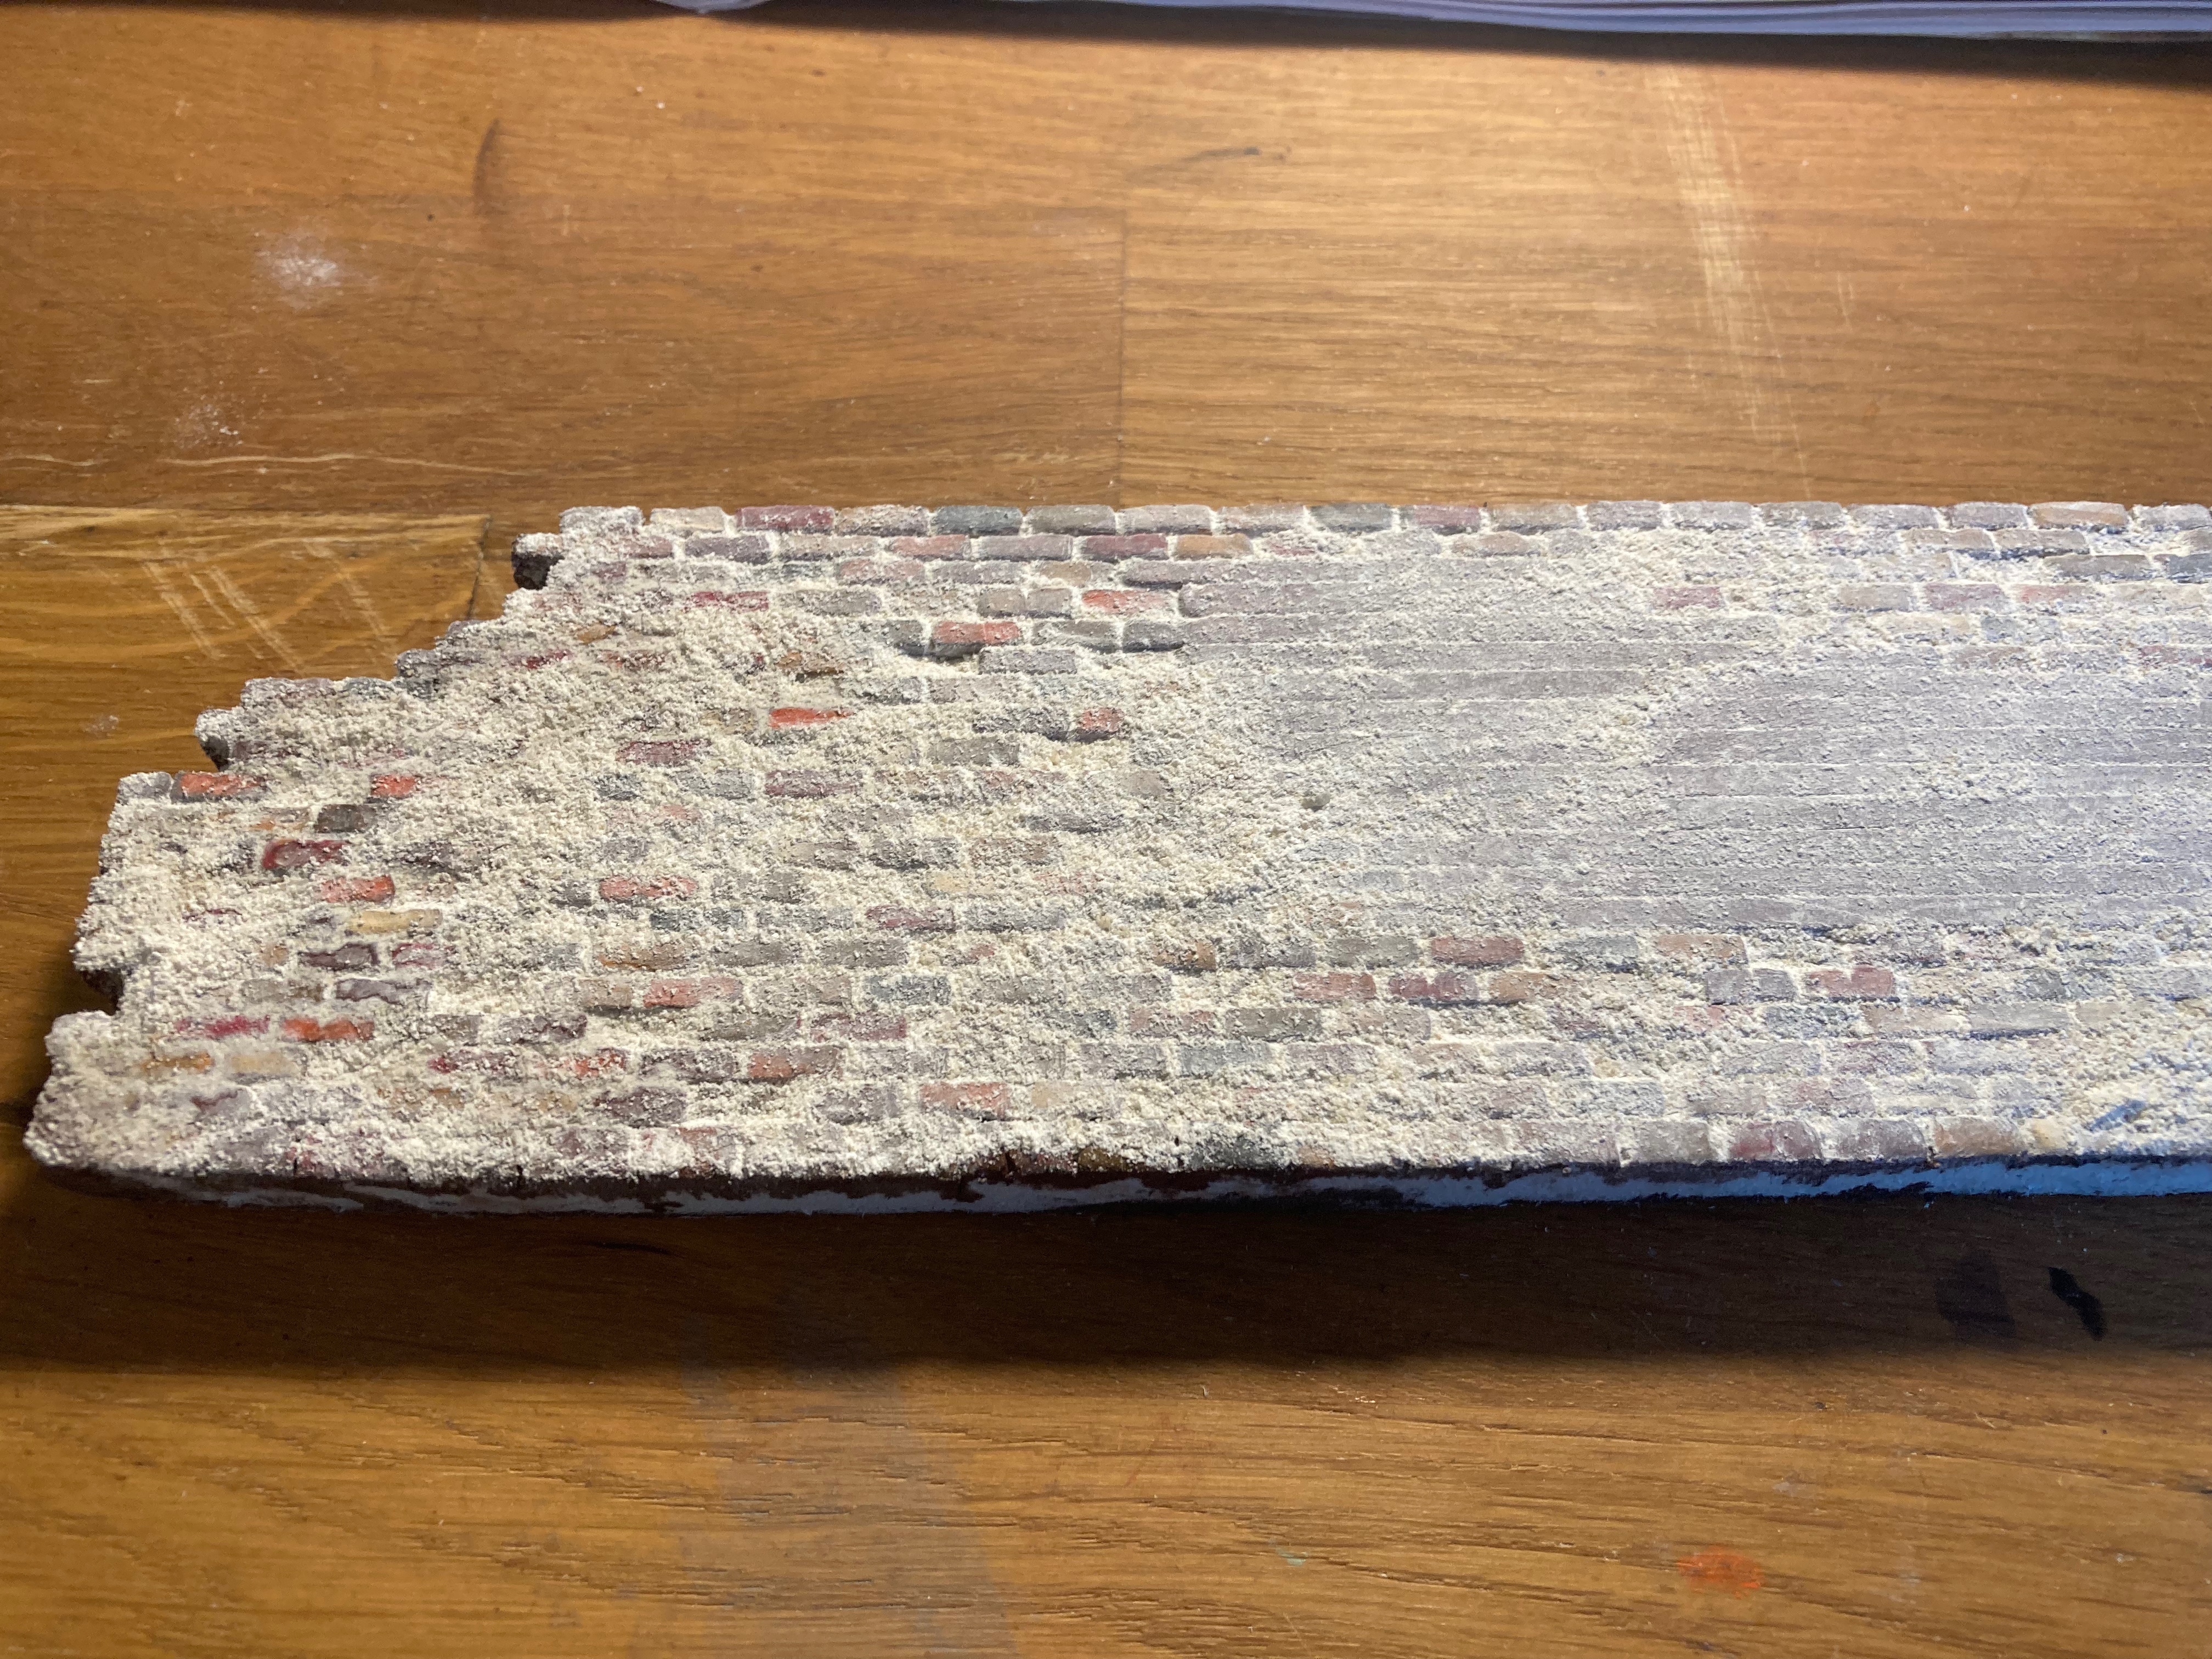

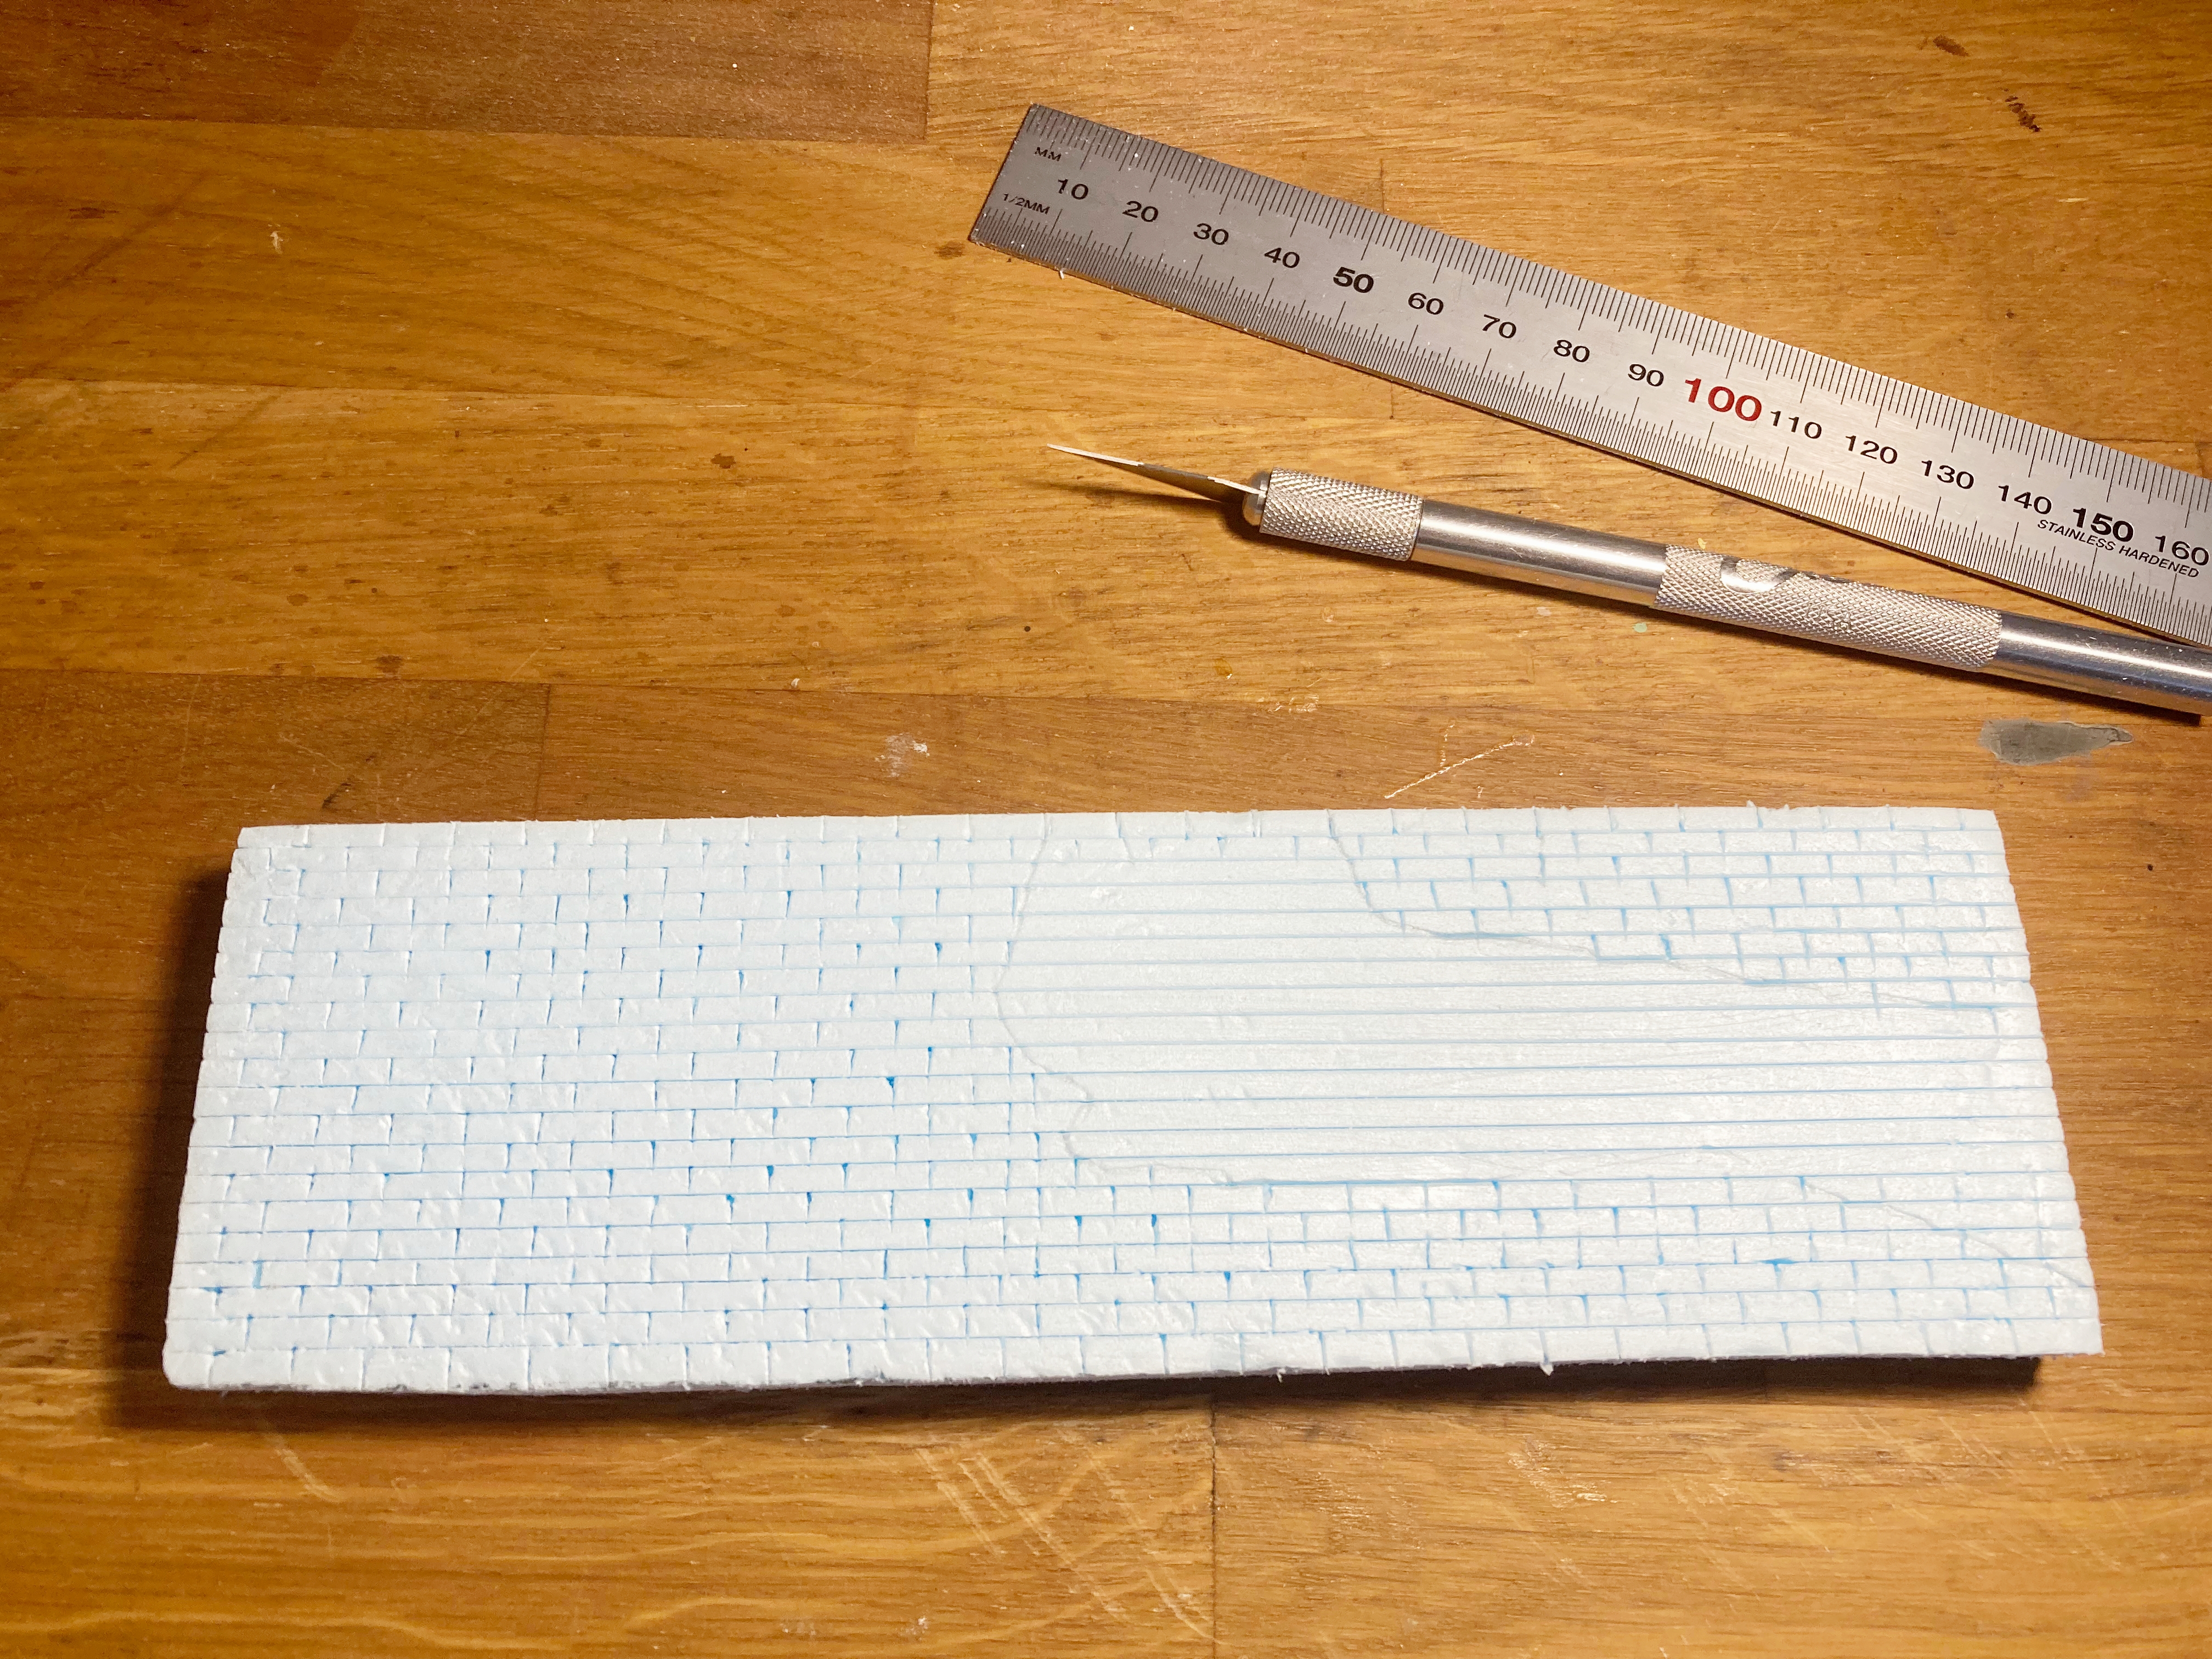
I have started on the old brick wall which shall serve as a scenic background for the "decaying stuff". I am building the wall out of foam, of which I first cut a piece of suitable size. Then I scribed the brick contours into the foam with a hobby knife.
The part where the bricks are missing will be an area of the wall where the original plaster still remains, thus obscuring the bricks.
Next step was to widen the knife scribes to get the look of individual bricks. I used some dentist's tools for that (I don't know if they actually are authentic tools used by real dentists but that's how they were advertised 😀 ).

I will do some more forming of the bricks, removing some and generally trying to get a more worn look.
A quick (and badly executed) brush paint job to check if the chairs can pass as chlidrens' chairs by painting them in vivid colors. I think this might work.

I sat out to prime some of the 3D printed 1/35 scale chairs I bought for this little project. Like this:

Perfectly OK chairs, at the first look. Then I thought it would be nice with a matching table, which I scratch built from styrene and some brass rod. But when I placed a chair next to the table I saw that something was out of scale. The chair looked awfully small alongside the table. Measurements and calculations showed that the chairs are rather 1/45 scale than the advertised 1/35. Bugger! 😒
The small size also reveals itself when a chair is placed alongside the bike. The picture below shows the problem.

The fridge and the washing machine (from the same manufacturer) are also on the small side, but only a tad. I think they can pass. What to do with the chairs I do not know right now. I'll postpone that decision for now, and start working on the scenery base instead. Seems funnier. 😐
Attention turned the appliances: a refrigerator and a washing machine. The kits are 3D printed and do not contain very many parts, but are well executed and contain a surprising amount of details. Here are the parts (except for the glas part of the washing machine hatch), after priming:

And here they have been assembled and given a basic coat of white paint.

Even the inside of the washing machine and the back of the refrigerator are modelled!

Time for decaying, i.e some rust and grime. Perhaps I overdid it some? At least the grime in the fridge.

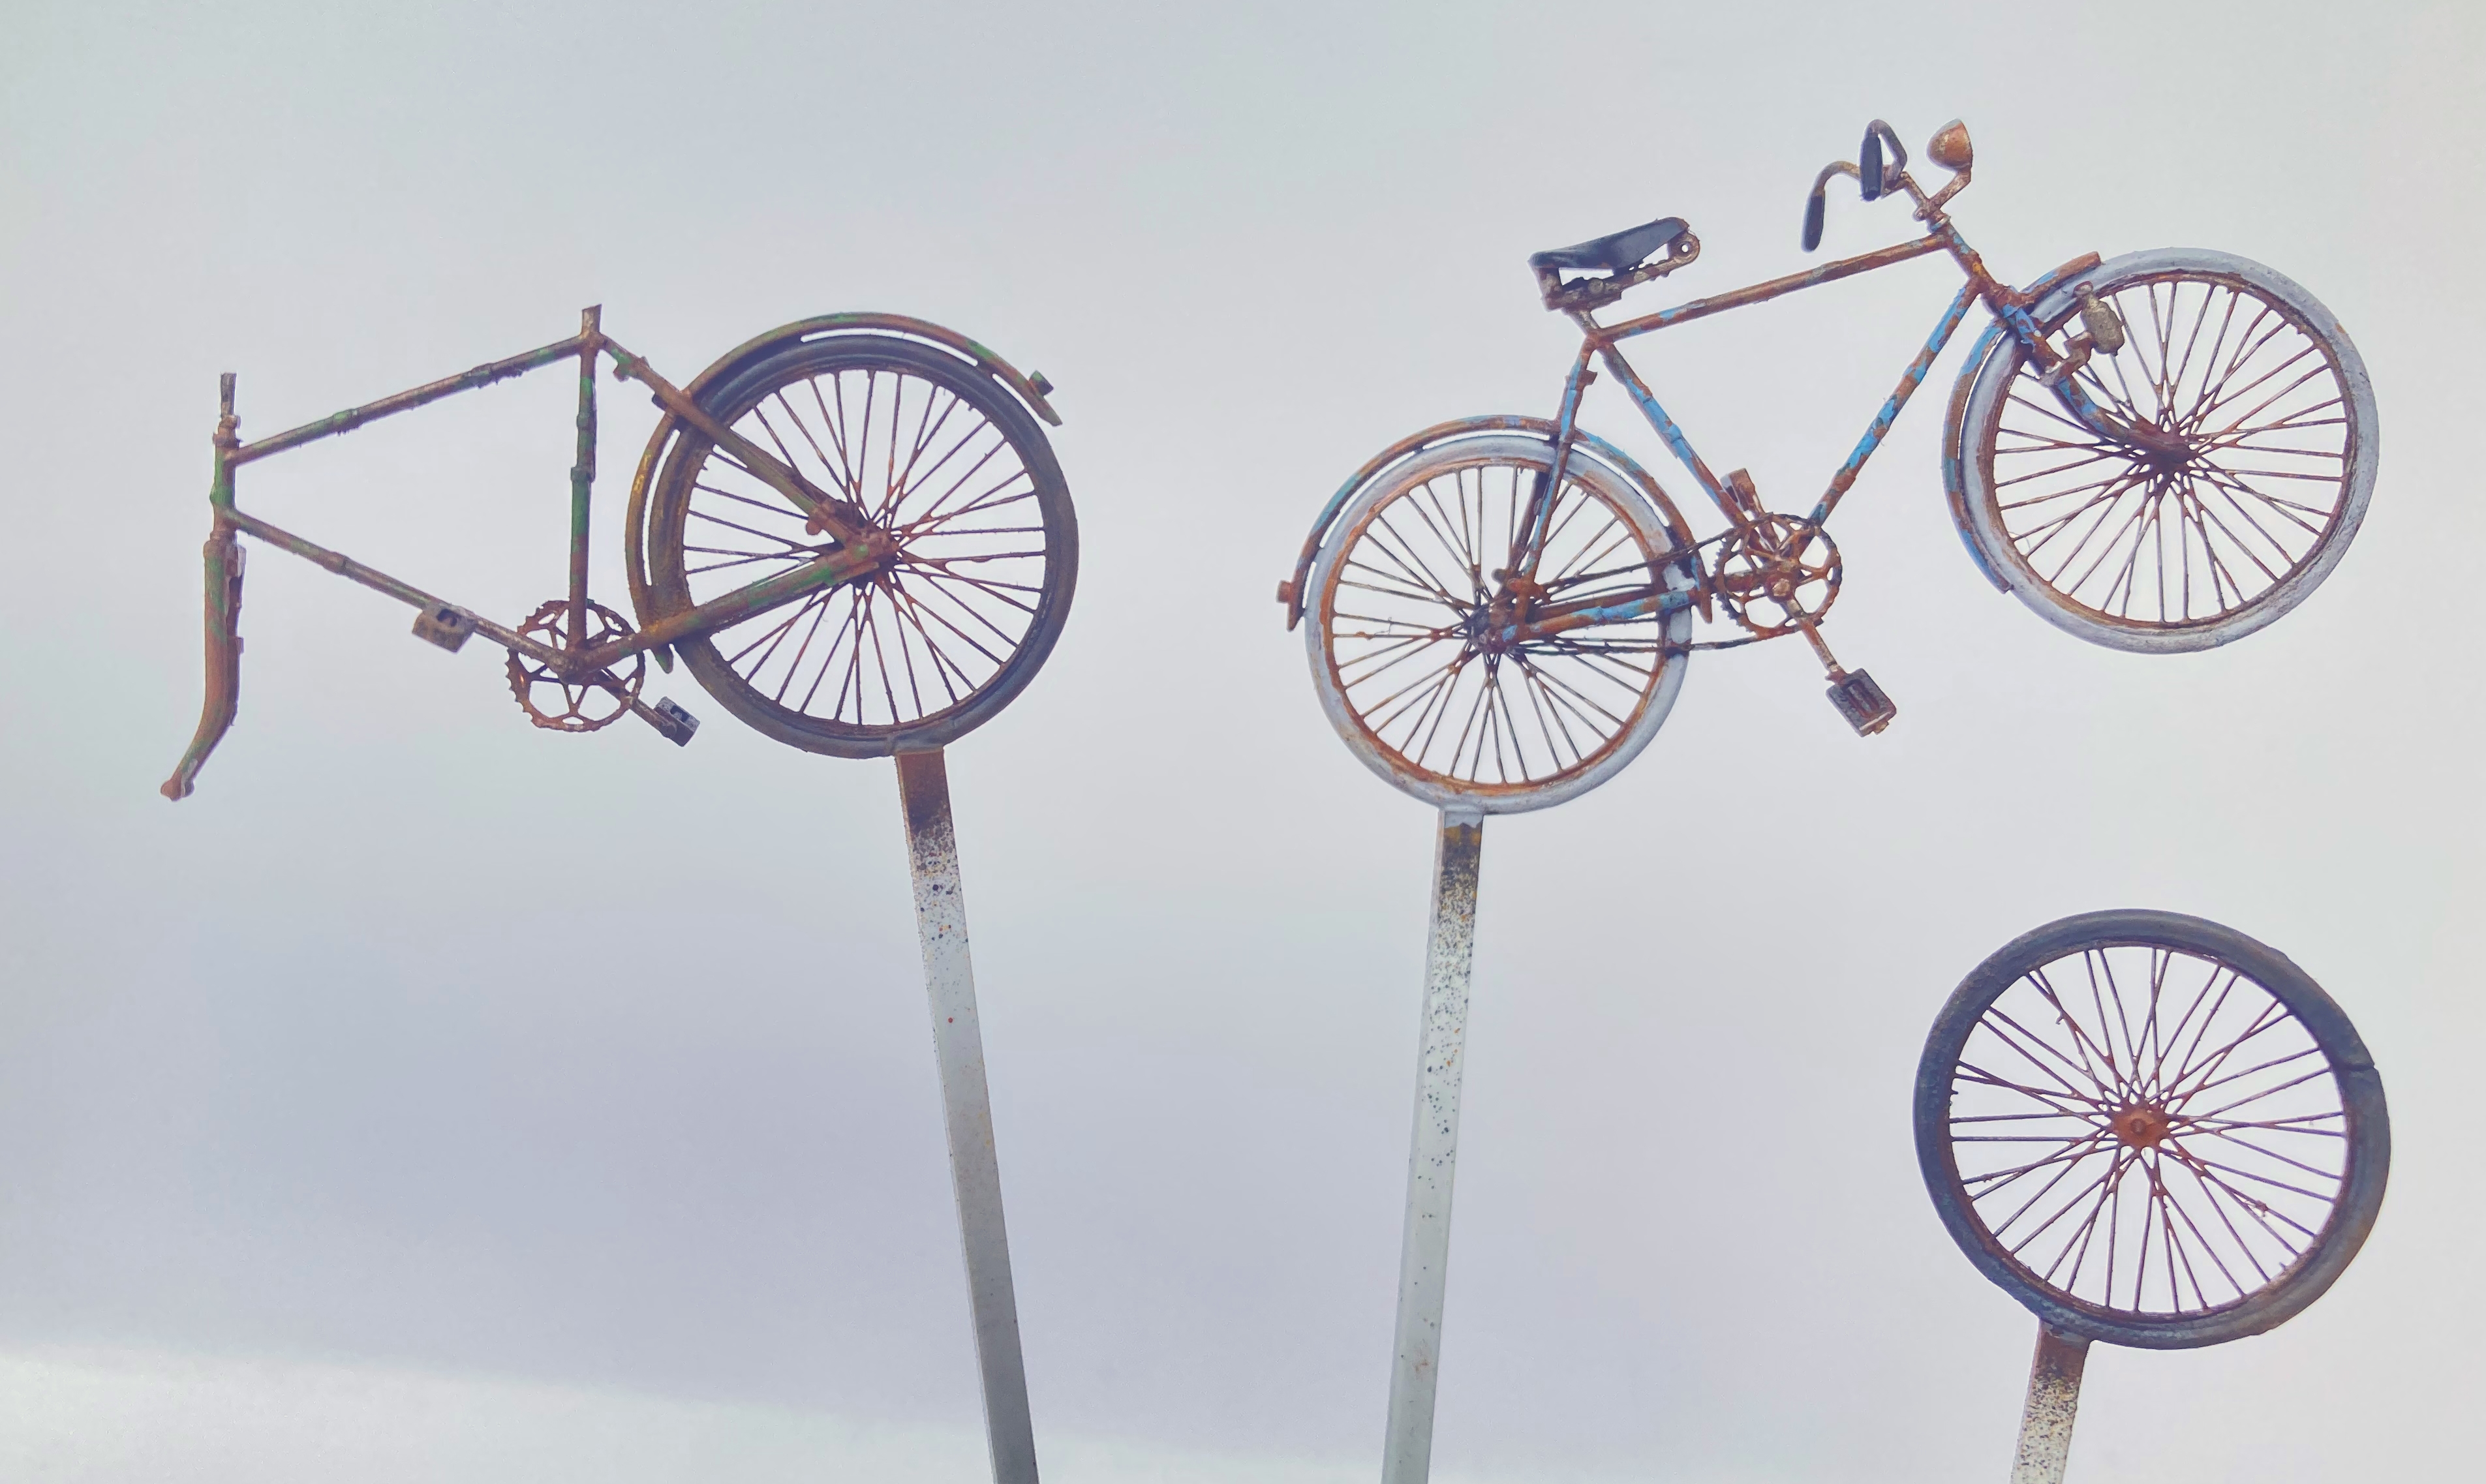
I continued working on the bikes. First a general layer of rust colors.

And then the various parts were brush painted:
- An aluminum color on all the bare metal and chrome parts.
- Remnants of the original frame color
- Black and grey on the tires, saddle and handles.
Then it was all brought together with a light rust wash and some weathering powders.
I'll leave it at that, at least for the time being, and turn my attention to the refrigerator and the washing machine.
I started by assembling the bicycles. It turned out that the actual bicycles where identical in the two different "Soldier-with-Bicycle" kits I had bought. The two kits where the same, except for the figures themselves. What otherwise differed between the kits was which gear you were supposed to load onto the bike. This is what the bike parts of the kits both looked like.

I just wanted the generic bike parts and not any of the military gear. I also did not use the more archaic looking parts, like the old style hand-brake handle, since I wanted the bikes to pass as a little more modern items, matching the washing machine and the refrigerators.
This was not a very easy build (for me at least), since many parts were very small and fragile, having a tendency to break. Resulting in some not very nice looking attempts at mending.
I made one of the bikes more or less intact looking while the other one has been somewhat cannibalized and wrecked Here are the two bikes after assembly.

Long time, no post. But now I think it is time.
I have decided to make a try at a small vignette just showing ordinary everyday things in decay. Yes, as simple as that. Should give an opportunity for some fun weathering. My inspiration is stuff like this.


With the car itself done I made a vignette to showcase it. Here is a whole bunch of pictures of it sitting long abandoned.