The diorama/vignette/scene, whatever you want to call it, is done. Here is an overview picture.

And a few closeups.


A blog about my non-railroading modeling.
The diorama/vignette/scene, whatever you want to call it, is done. Here is an overview picture.
And a few closeups.
First paint pass on the grass - buff.

And then a number of passes with green and greenish-yellow tones, and some others. The grass-less patches also got some color. I wanted a somewhat dried out look, not anything lush, so I think I'll stop here and see what it looks like when I have added the wall and the decaying stuff, and uncovered the street.

I added some more grass tufts, and some more 6 mm static grass as well.

And then, surprisingly, but as I have seen been done by others, and have done a few times myself, painted all of the grass and terrain black!

Why would you like to do a thing like that? Firstly, if you use a variety of different vegetation materials and of different brands the effect might end up a little off, often with colors a little too bright and shiny. Natural colors are often very subdued. One way to get round that is by airbrushing everything with colors of your own choice, and for this to work you would like a consistent base color. Using black as that color furthermore helps creating fake shadows and depth.
None of this is my idea to start with, but something I have picked up from various online sources. But I have used it before, and like it.


The street is being paved, by glueing the stones one-by-one to the foam base. Madness? Anyhow, here they are all in place.

After which they were painted and otherwise treated to make it all look like an old paved street.
I also took the time to
- Build and weather a barrel, supposedly used by some hobos for a warming fire.
- Dip some scale sized pieces of corrugated (aluminum) sheeting in an etchant (ferric chloride solution) to give them a rusty look.
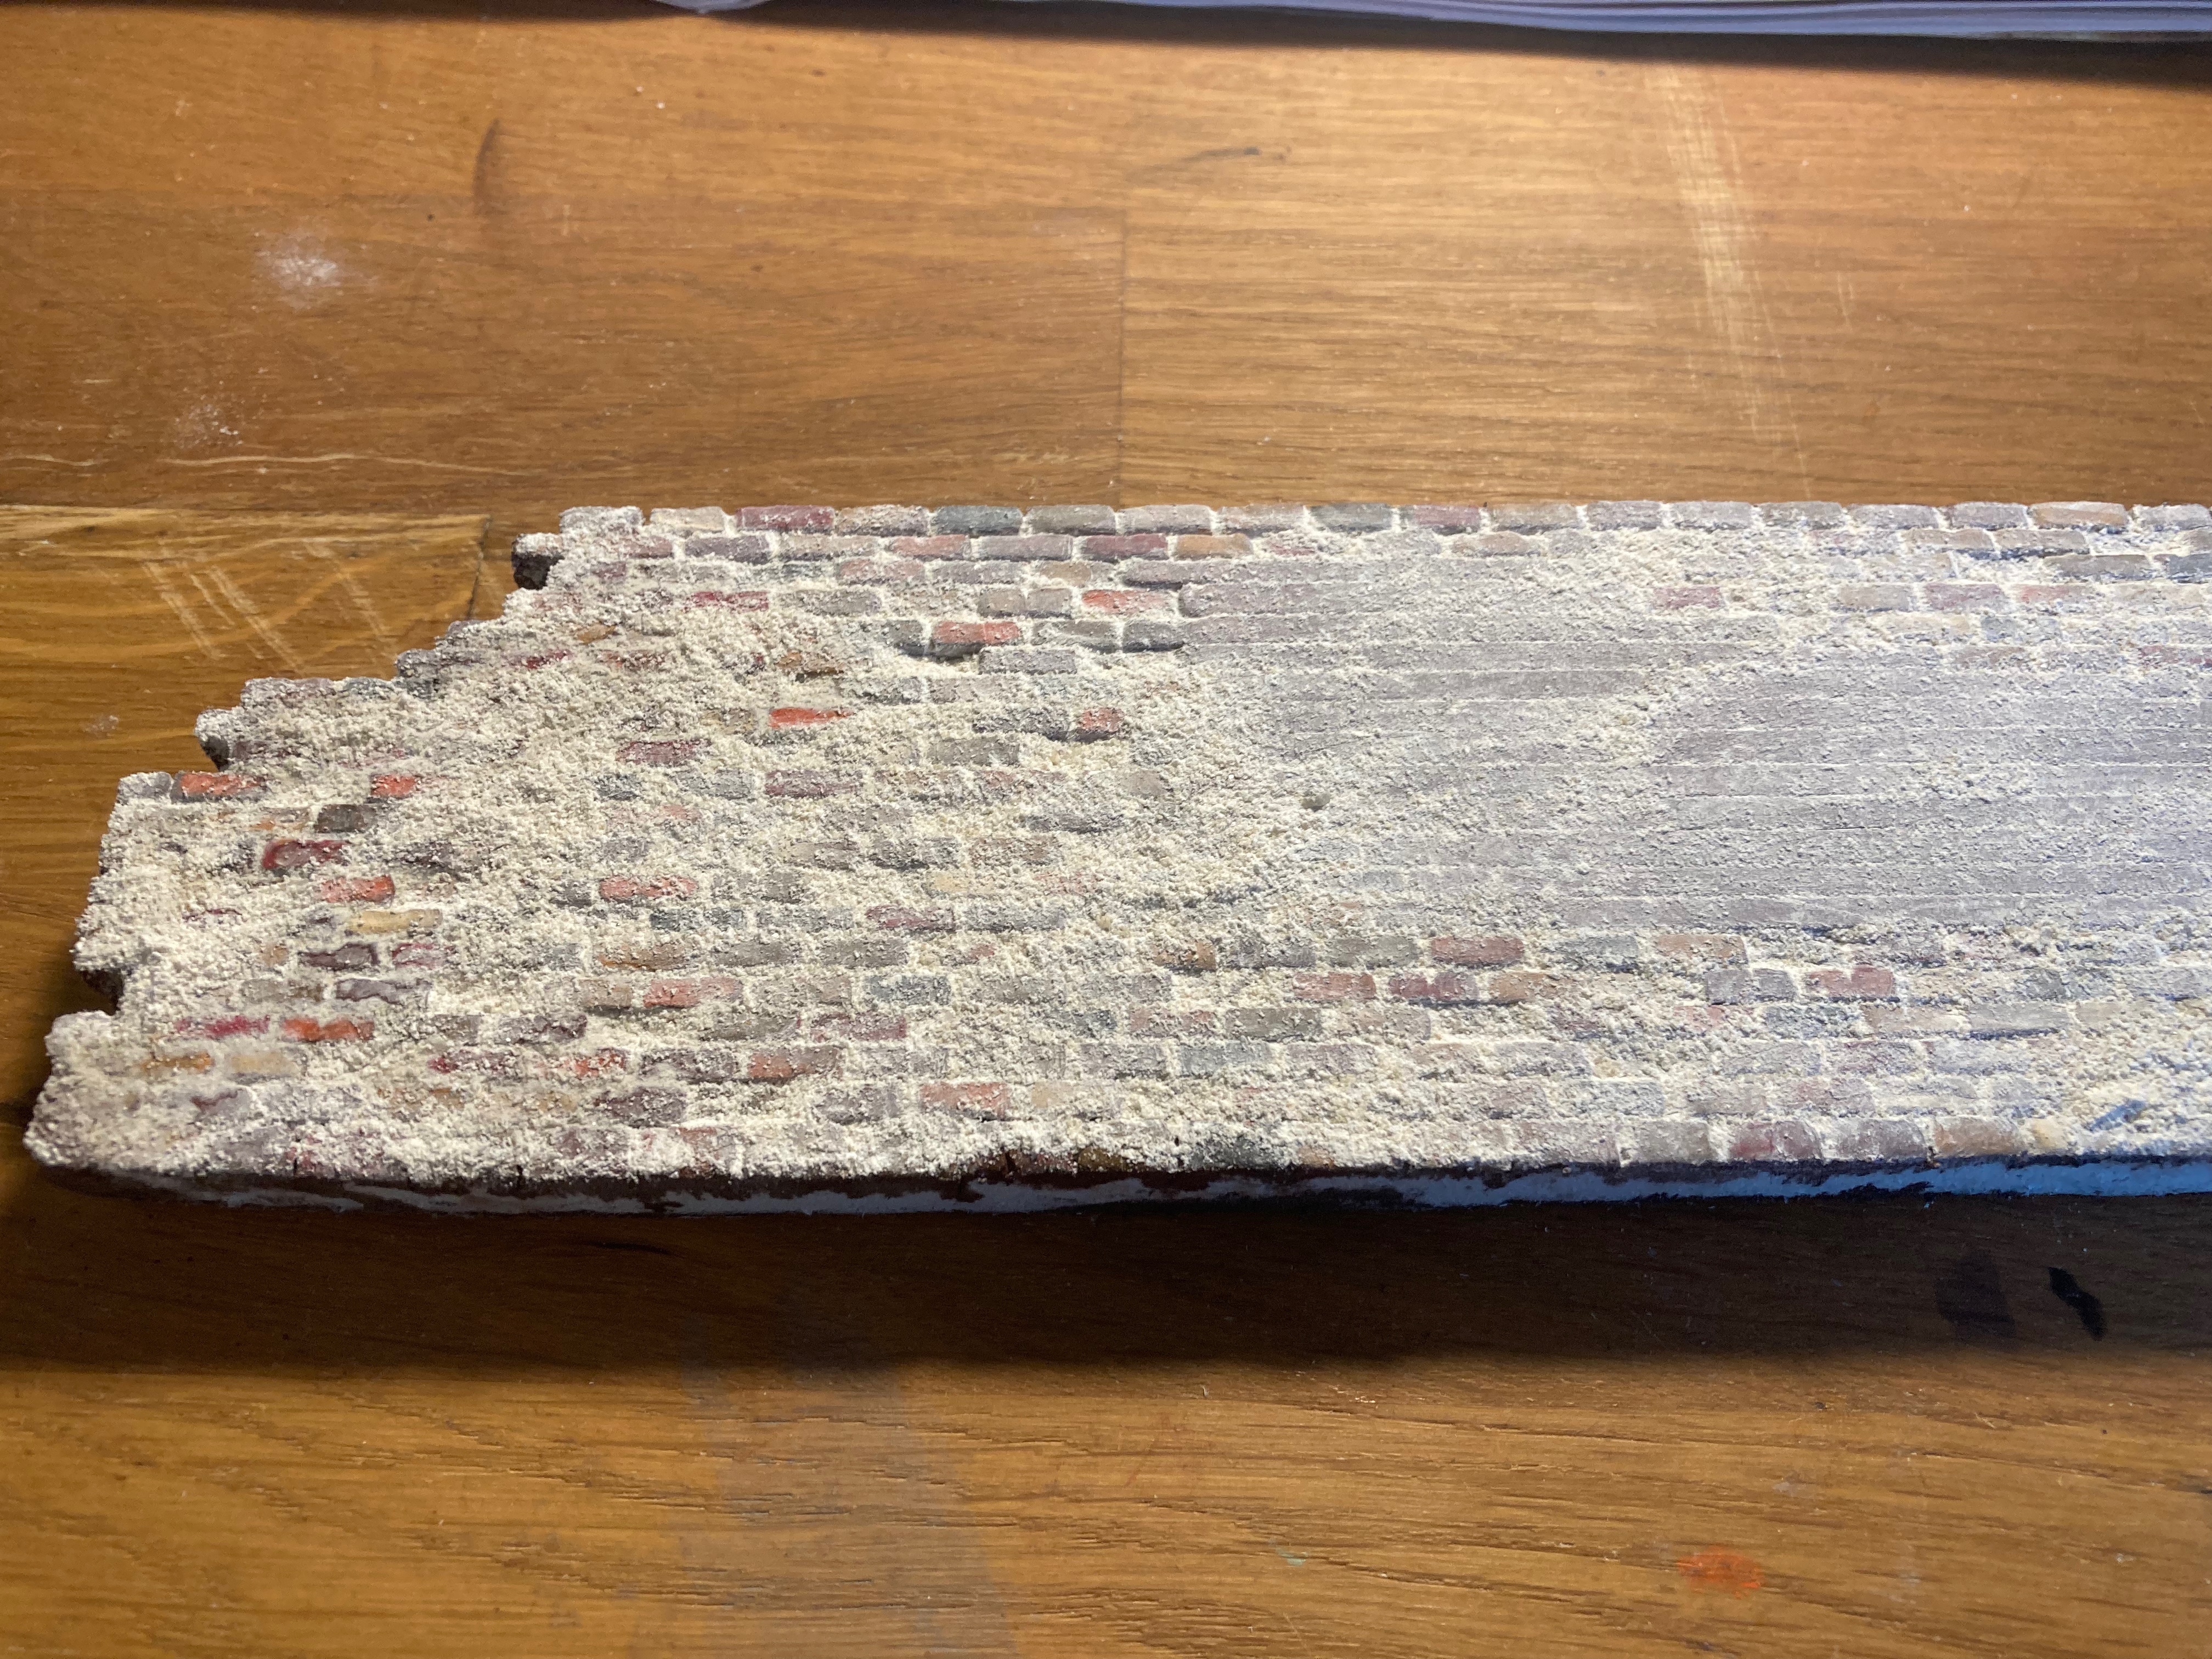
- Make some loose bricks representing a few of those which have fallen off the wall.

I have begun laying out the scene itself.

The base is a piece of foam on which the brick wall will sit at an angle, just to make it a little more lively. At the front a piece of a stone paved street will show. To get the rest of the terrain, and the wall, a bit higher than the street it will sit on a piece of foam board. That's the black piece in the picture above.
Here is a picture of me cutting 4 mm cork into Belgian Blocks for the street. Yes, I could have scribed and carved the stones right out of the foam, but I just did a brick wall that way...

More work on the brick wall. First some forming and sculpting in order to get a more varied and interesting look.