Thursday, April 26, 2018

Stone laying test continued

Once the glue had set and the "cork stones" were firmly attached I proceeded by filling the joints with mortar. I used an ordinary dry wall spackle for that.


I spread the spackle liberally all over, and then brushed off the excess with a tooth brush.

Next was painting and weathering, in three steps; 1) A gray paint with just a dab of blue mixed in 2) Some black brownish color applied more like when dry brushing 3) A dark brown wash.


I'm not sure if the stones have to much of a sheen, and needs to be dulled, or if the sheen is OK. Or perhaps the sheen is there because the wash is not yet completely dry, although it feels dry to the touch. Tomorrow will tell I guess.

Tuesday, April 24, 2018

Testing stone laying

I intend to set the pavement on the diorama with stones. Not the street part, but the pavement, because that is how I remember certain areas from my childhood. For that purpose I have watched a number of YouTube videos on how to model cobblestones. Now, the term "cobblestone" is often used both when referring to cobble-sized roundish stones ("kullersten" in Swedish) and when actually referring to sett paving using quarried stones, also called Belgian blocks ("huggen sten" in Swedish). What I am after is really the latter, but the videos mostly refer to cobblestones. Here is an example of the type of stone I mean.


The technique described in the following video is what I have decided to try: https://www.youtube.com/watch?v=rAyxveNfnsE

Since I have never used this method before I decided to do a small test area, using 4 mm cork sheets. First, 4mm strips of the cork is cut, like this:


Next, the strip is cut into 4mm lengths, creating cubic pieces of cork.


Here a number of "stones" have been glued to a piece of foam, creating my test patch. In my test patch the stones are not staggered. In real life, cubic stones seems to sometimes be staggered and sometimes not. Often some rows are staggered and others are not, as in the picture above.


The tedious part, as I learnt from the video, is that you really need to sand the edges of each stone. Otherwise they will look unnaturally sharp. That part, which I agree turned out to be crucial, is really slowing things down. But if that is what it takes, I'm prepared to do it.


Monday, April 23, 2018

A storm drain

I have built yet another item for my diorama - a storm drain. Based on photos of real drains I put the model together from various pieces of styrene. First a picture of the unpainted parts, and then of the final drain.


This picture shows the diorama parts built so far - the telephone booth, three copies of the electrical box (of which only one will actually be used) and the new storm drain.


Thursday, April 19, 2018

Mockup

Did a mock up today and tested the placement of the different parts of the diorama.


I think that the telephone booth shall be moved a little forward, not letting it sit that close to the wall. 

Also, I have so far been thinking about this scene as showing a part of a town square or similar, but now I think maybe it should be a wide sidewalk instead, with the gutter and part of the street visible along the front. That may help break it all up the some, adding additional visual interest.

Tuesday, April 17, 2018

Work on the electrical box

Work has continued on the electrical box. Well actually, there are several of them but only one will end up on the diorama. See this post for a description of the real-world prototype and the 3D-printed model.

Since the 3D-print was not made to the full depth of the box I attached a few layers of styrene at the back of each box. The boxes where then painted gray. Here they are mounted on toothpicks for easier handling.


The next, and final step was to add the warning stick. As you can see, only one of the sticks has yet got its black-and-yellow marking.


Monday, April 16, 2018

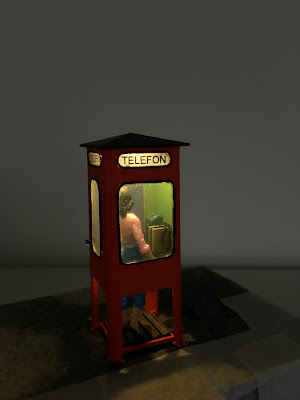
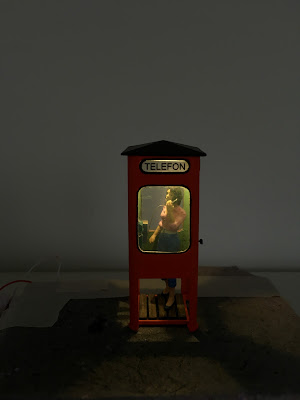
The telephone booth is finished

Today the telephone booth was finally brought to the finish line, with some last paint touch up and the non-stop talking young lady inside.


Time to move on to the rest of the diorama.

Wednesday, April 4, 2018

A figure

A person actually doing something in a scene, tends to make the scene in question more interesting. Since the main feature of my diorama would be the telephone booth, a person making a phone call seemed to me to be the most logical choice.

In order to get a few figures to choose from I ordered a bunch of unpainted Preiser figures, namely their set #63000. It looks like this.


On the Preiser web page this set is listed under the scale 1:32-35, which is is just what I wanted. However, once I had the set in my hands I soon discovered that the figures are more towards the 1:32 scale than 1:35. Compared to my 1:35 telephone booth the gentlemen all looked like 2 meter giants! So the choice of which figure to put in the booth was made easier. It had to be the one of the smaller ladies.

I selected the young woman who stands as the 5:th person from the right in the picture above.

Since I wanted her to actually use the phone I started by doing some surgery on her. I cut and bent her left arm so that she would hold the telephone receiver in a natural way. Next I painted her, as shown below. I think she can pass as a young woman from the 1960's.


You have to excuse her staring eyes. My fault 😃

Tuesday, April 3, 2018

Lighting

I wanted to be able to display the diorama as a night scene, and not only as a daylight scene, so I added lighting to the telephone booth. A small SMD LED is sitting in the ceiling. It is driven by two AA batteries which I eventually intend to hide in the base of the diorama, reachable from the underside.


Monday, April 2, 2018

Glazing

Finally the glazing is done, including the boards with the text "Telefon". The booth needs some paint touch up but I'm postponing that until later.


As can be seen, I have also added the floor planking.